AngularJS or Plain JavaScript?
You are currently reading the documentation for adding custom fields with AngularJS. If you are working with the Plain JavaScript template, you will instead want to read Custom Field Types.
Custom Formulate Field Types
Formulate comes with a few common field types, such as text, checkbox, drop down, and upload fields. However, you aren’t limited to just these. You can create your own custom field types. Read the sections below for instructions on how to do this.
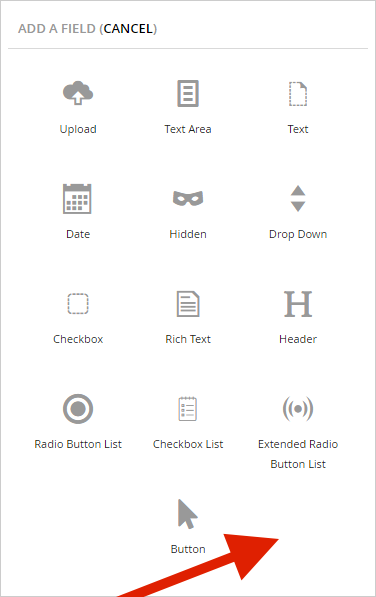
When you are done, your new field type should appear in the dialog to add a field:
The Back Office Directive
In order to allow for your custom field type to be used when constructing a form in the back office form designer, you’ll need to create an AngularJS directive. There are typically two components to this, as shown with this drop down example:
The markup is what is displayed below the main components (name, alias, label) of each field. In this example of the drop down, it is just displaying a data value picker (so the user can choose the items to appear in the drop down).
The JavaScript is what defines the behavior of the directive. In the case of the drop down, it is defining the directive (including the markup to use for the template), and it has some functions to manage the picked data value (e.g., to store it to the configuration for the field).
Note that when creating a custom field type, you will not be able to rely on the formulateDirectives service
to get the markup for your directive. Instead, you can embed the markup directly in the JavaScript as a string (not recommended),
specify a URL to your directive markup, or create your own service that can load up the markup for your directive.
Of those options, the simplist is probably to just specify the URL, which would look something like this:
function directive() {
    return {
        restrict: "E",
        replace: true,
        // Note that it's "templateUrl" rather than "template".
        templateUrl: "/some-path/myCustomField.html",
        controller: "formulate.myCustomField",
        scope: {
            configuration: "="
        }
    };
}
The Field Type
To let Formulate know about your new type of field, you’ll need to create a class that implements the IFormFieldType interface.
Formulate uses reflection to find any classes that implement this interface, and these implementations give Formulate
all it needs to know about those field types. Since the drop down example is a bit complex, I’ll start with a simple example,
the text field:
It has just a few properties and a function. Here is the purpose of each of them:
- Directive. This property indicates the AngularJS directive to render in the back office in the form designer.
- TypeLabel. This property indicates the text to display to the user in the dialog that allows them to add a new field to their form in the form designer.
- Icon. This property indicates the icon to display to the user in the dialog that allows them to add a new field to their form in the form designer.
- TypeId. This property is a GUID that uniquely identifies the field type (e.g., when serializing the form definition to the file system).
- DeserializeConfiguration. This function deserializes the string version of the field’s configuration. Since the text field doesn’t have any configuration, it just returns null.
For a more extensive example of a field type class, refer to DropDownField.cs.
Render Field for Responsive Bootstrap Angular (RBA) Template
While Formulate allows for custom templates to render forms,
it is likely you will want to render your field with the Responsive Bootstrap Angular (RBA) template.
When you install Formulate, you will find the JavaScript for this template in ~/App_Plugins/formulate/responsive.bootstrap.angular.js.
Rather than modify that file directly (it may be overwritten on upgrades), it is recommended that you register a field renderer in a separate file. Let’s assume you have followed the render form instructions and have this line of JavaScript somewhere in one of your CSHTML files:
var app = angular.module("app", ["formulate"]);
That is the line that creates your Angular application and indicates that Formulate is a dependency. Shortly after that line, you could include this JavaScript:
// This function renders the "hello" field.
function helloFieldRenderer(field, options) {
    var combinedJson = {
        field: field,
        options: options
    };
    var fieldData = JSON.stringify(combinedJson, null, 2);
    var encodedFieldData = document.createElement("span")
        .appendChild(document.createTextNode(fieldData))
        .parentNode.innerHTML;
    return "<div>Hello, here's the field data:</div>" +
        "<pre>" +
            encodedFieldData +
        "</pre>";
}
// The options used when rendering the "hello" field.
var helloFieldOptions = {
    // If true, a label will be included before the field.
    optionalLabel: true
};
// This is what registers the field renderer.
app.config(function (FormulateFieldTypesProvider) {
    FormulateFieldTypesProvider.register("text", helloFieldRenderer, helloFieldOptions);
});
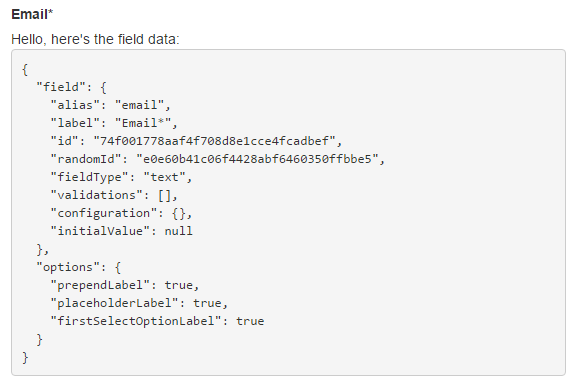
That will override the rendering of the built-in text field. However, if you create a custom filed type, you would specify the name of that custom field type rather than specifying “text”. If you use the above code, you will see something like this rather than a text input field:
That will get you started with a “hello world” field. Once you need to dig in and do something a bit more
complicated, you can refer to the createTextField function in builtin-types.js:
function createTextField(field, options) {
    var el = angular.element('<input type="text" />');

    if (options.placeholderLabel) {
        el.attr('placeholder', field.label);
    }

    return setGlobalInputAttributes(field, el);
}
Note that it’s calling the setGlobalInputAttributes function, which is part of the core of Formulate,
and is inaccessible to external code. That means you’ll have to create that functionality from
scratch. If you like, you can just copy that function from that same builtin-types.js file:
function setGlobalInputAttributes(field, el, options) {
    options = angular.extend({
        // When set to true, this element will get the "form-control" class.
        formControl: true,
        disableAutocomplete: true,
        bindToFieldModel: true
    }, options);

    el.attr('id', fieldId(field));
    el.attr('name', 'field_' + field.id);
    el.attr('aria-label', field.label);
    el.addClass('formulate__control');

    if (options.bindToFieldModel) {
        el.attr('ng-model', 'ctrl.fieldModels[\'' + field.id + '\']');
        el.attr('formulate-validation', true);
    }

    if (options.formControl) {
        el.addClass('form-control');
    }

    if (options.disableAutocomplete) {
        el.attr('autocomplete', 'off');
    }

    return el;
}
In the future, this function might become public so it can be called outside of the core Formulate code base.
Review
You should now have a working custom field type. Here were the steps you took:
- Create an AngularJS directive (in the Umbraco back office), including the JavaScript that refers to the markup used by the directive.
- Create a C# class that implements the
IFormFieldTypeinterface. - Render the field renderer used by the Responsive Bootstrap Angular (RBA) template (on the frontend of the website).
If you have created a custom field type, be sure to let me know so it can be considered for incorporation into the core of Formulate. If you have any questions, feel free to post a message in the forum.